November 26, 2010

Tutorial: 20 min. Play Blanket

This little blanket is great to show case your favorite fabric and perfect for when you need quick baby gift.

Materials:
1 yd fun fabric
3/4 yard of super soft minky fabric (cut along the fold line- you will end up with 2 squares)
coordinating thread
pins

Layout your yard of fabric face down. Place the super soft minky fabric right side up on top. Trim around so that your fabric is roughly about 2 inches bigger than the minky fabric all around- see pic below.

At each corner follow the steps pictured below...

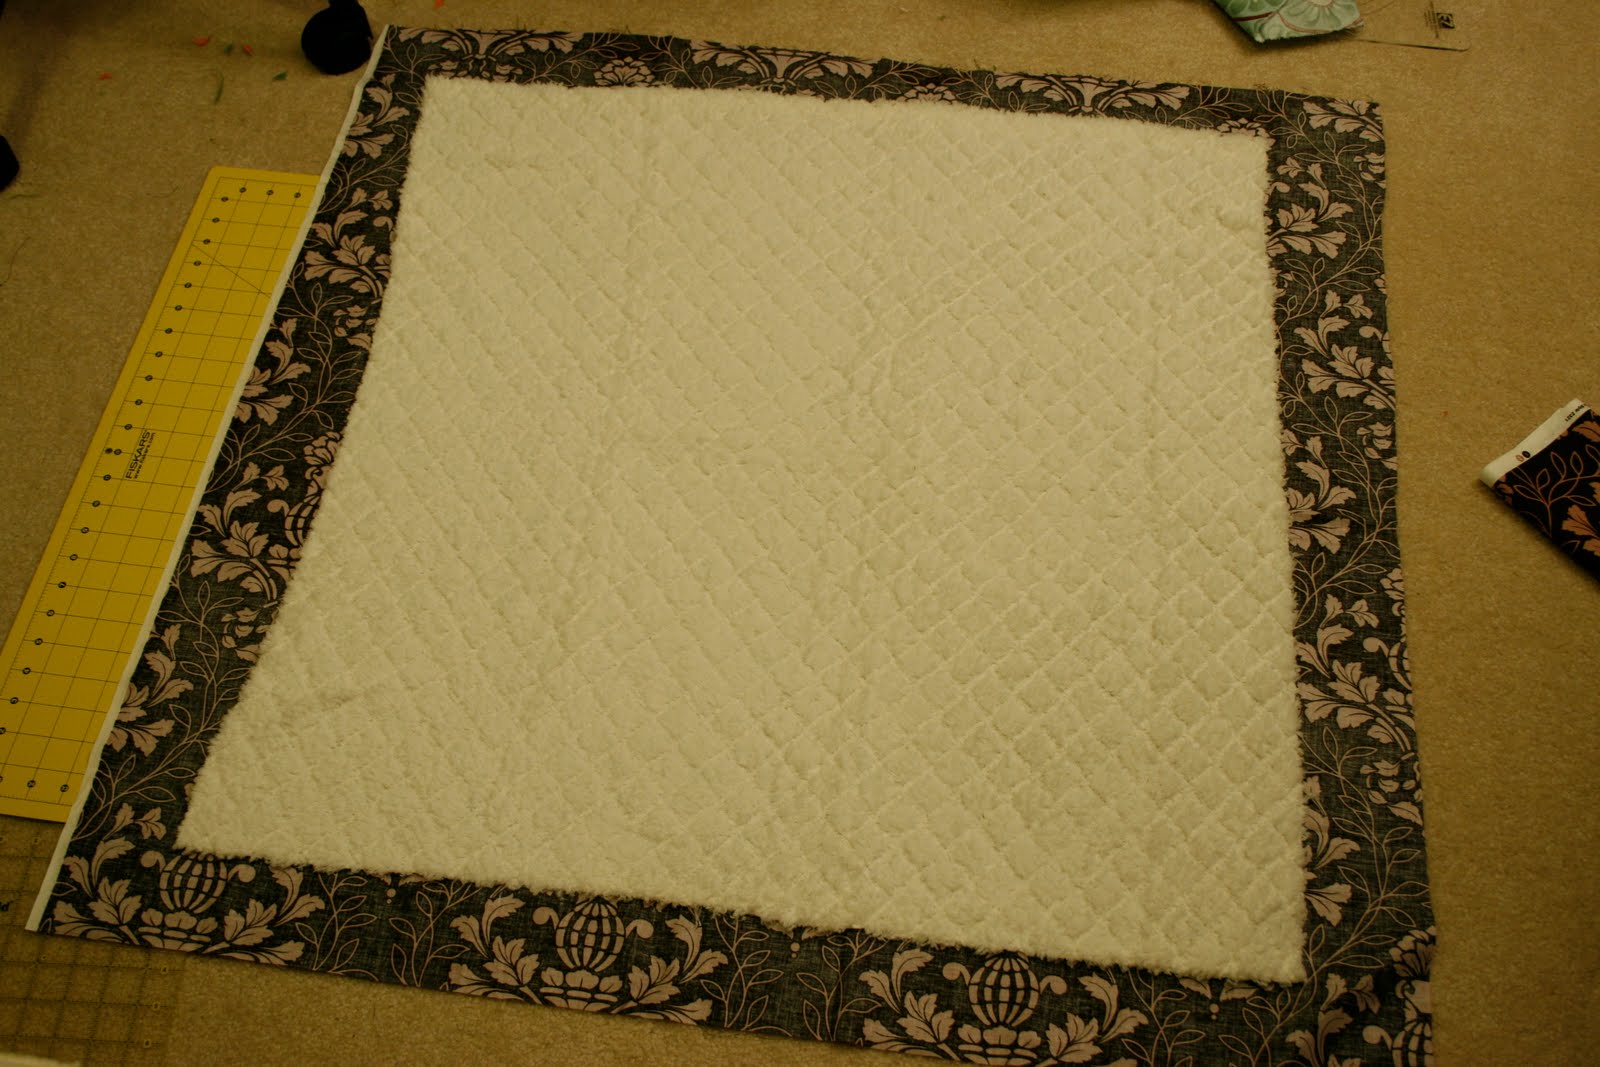
At this step make sure the fold of your printed fabric should lay next to the edge of the minky fabric.

Then fold it once more over the minky fabric to create a perfect mitered corner.

Pin all around to make sure nothing shifts during sewing and then sew 1/8 of an inch from the fold line all around.
Ta Da!
A cute blanket to put out when baby is ready to play.

These are so fast and easy I whipped up two in just 30 minutes!

If you make your own, I would love to see how they turned out.  Post pictures here.

Take care mucho,
-Natalie

November 12, 2010

100 Quilts for Christmas!


I love this!!! Two fellow DC Modern Quilt Guild members have come up with a great idea. They are asking for people to participate in creating baby/ toddler sized quilts for those that are in need. They are hoping that people throughout the country (or world!) sew and give to local charities. They want to have 100 made and donated in 1 month.

Want to learn more about it? Check out their websites by clicking on the button above!

It technically begins on Nov. 15 and runs through Dec. 15 but you can always start a few days early.

I am pledging 3 quilts!

Take care mucho,
-Natalie

November 10, 2010

Oh, Franson's Quilt Along

I have been a long time admirer of Elizabeth from Oh, Fransson! I have her on my google reader and am always reading what she has to share. I kept seeing and reading her fun posts about her Tokyo Subway Quilt Along. I wasn't planning on joining in on the fun since I have so many things going on, but then I saw her post with all the blocks together and possible backing choices that I couldn't resist any longer.

I joined the group VERY late. I mean most participants had all 25 blocks done when I just started off. I figured it didn't matter since Elizabeth was going to take a break for Fall Market anyway. I have quickly started to catch up.

I have cut all the squares (which is lots and lots). There is a ton more white ones but it didn't make for such a fun pictures.


Here are blocks 1 & 2, though I have finished a total of 5.


Although it is a bit tedious I think it is turning out awesome! I still have 20 more to go. My goal is to have it done for Christmas for my husband (he's half Japanese, I think he would get a kick out of it).

Have you joined some fun quilt along or sewing group lately?

Take care mucho,
-Natalie

November 8, 2010

More Christmas Early....

I finished my sisters tree skirt! Remember I posted about it a few weeks ago? Well I finally sandwiched the layers, quilted and sewed some binding. Every step of the way on this project just made me more excited. Everything just came together better than I had envisioned it.

My sister came home last weekend and took it home with her to use right away. I had to quickly snap a finished picture before it got put into her suitcase, so sorry for the not so great photos.


I got a little close up of the quilting and one of the applique ornaments. I also had to put one of my fun labels. I am trying to leave my mark on as many things I can remember to.

Since I have been in such a Christmas mood I whipped up a very cute Kate Spain 12 Days of Christmas throw quilt. I made it using charm squares and a jelly roll. This is the first project that I have used pre-cuts and I can't believe I haven't used them earlier! They are the best invention ever, totally saving me some major cutting time.


I was so excited at how quickly this was coming together that I ended up making this in 2 days start to finish. I think that may be a record for me.

Have you discovered the greatness of pre-cuts yet? Let me know what you do with them because I have a feeling I am going to be obsessed with them from now on :)

Take care mucho,
-Natalie

November 2, 2010

Tutorial: Ceramic Cup Pincushion

I bought this little cup/bowl a while back in hopes of turning into a cute little pincushion. As I have been working on other projects it has been staring at me waiting to be transformed. I though this would be a great and quick tutorial to share with you all. It actually takes the smallest bit of sewing , but is super helpful to have around whenever you are working on any of your sewing projects.

Here is everything you will need to create your one of a kind pincushion.

The reason I fill my bowl/ cup with rice is to help weigh it down (doesn't tip over as easily) and to take up some space at the bottom so I don't have to use as much fiber fill.

You want to flip your bowl/ cup over on top of your scrap piece of fabric and cut it about 1 inch wider than the perimeter of your bowl/ cup.

Thread your needle and do a running stitch (a simple up and down) around the entire perimeter of your fabric. Keep your needle connected and put to the side for a second.

Take a clump of fiber fill and round it out in your hands. Take two layers of batting and cover half of your fiberfill ball,

Place the ball inside the fabric and pull the thread.

Make a knot in your thread to keep the thread in place and test out your cushion by placing it on top of your bowl/ cup.

Warm up your glue gun and pump out a generous amount of glue onto half of the inside rim of your bowl/cup. Press your pincushion ball inside your bowl/ cup. Then squeeze back the other half of your cushion put another generous amount of glue onto the other half of the inside rim and press the cushion again.

Ta Da! Your done! Can you believe how easy that was? These make great gifts for your crafty friends too. My mom got this one I made last year...

I decorated the rim of the teacup with some bias tape and pom pom trim. If you wish to decorate your rim just remember to do that before gluing in the cushion part.

Hope you have fun making these to show off your pins and needles!
I would love to see your fun pincushions.  Post pictures here for all to see. 

Take care mucho,
-Natalie